Introduction
OIDC is currently THE protocol for Authentication and SSO, and in my humble opinion Keycloak is THE auth server. But once you start your app, after the question “How do I configure my framework to work with OAuth2?” the next question must be necessarily be “How do I get permissions for my users?”. Keycloak gives you a REST service for that!
Recap of OAuth2 and OIDC
- OAuth2
- The protocol in which one describes the authorizations: the LANGUAGE
- OIDC
- OpenID Connect, the API interface that contains the endpoints to authenticate, request tokens and user information, complete with CLAIMS. If OAuth2 is the language, this is a full authentication and authorization SENTENCE
- Claim
- A piece of metadata about the user, that the Authority claims to be true. It can be an email or a permission. a FACT
- Scope
- A topic about the user, that the application is interested in: if it was a dialogue, it would sound like - **Application (App)**: "I am keen to know the user's email. So, I'm asking for a token with an 'email' scope." - **OpenID Connect (OIDC)**: "Ok, let's review if the user has granted you this particular permission (scope)." - **OIDC (Post-review)**: "It appears that the user has given the required permissions. I will, thus, place this claim in the appropriate LOCATION."
Building on those definitions:
Keycloak is an OIDC server (speaks good OAuth2) , where we can register our applications, configure our users by associating claims in different scopes to them.
The usual loop is:
- make an app
- register on your OIDC server some claims that usually are interpreted as permissions for that app
- associate claims to users, usually via groups
- when the app gets a user, in order to understand about her, needs to decode such claims to permissions.
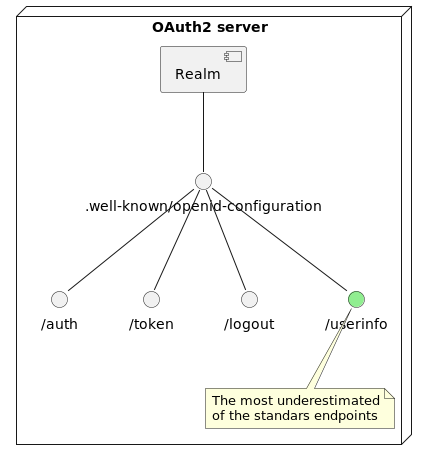
The not so well known .well-known
OIDC provides standard APIs, to do the most important user-related activities. Often tho, programmers like to have everything in their access token: we need to look into it for validity range etc., we might as well make it worth the trip and collect all the metadata on a user that we can 💪.
This can have the side effect of making your token huge (more than 8KB!!) and uncool 😤 to move around in each HTTP request, especially in the sloppy ( and not uncommon ) case of all applications stuffing their claims in all tokens… YIKES! 🙀!
PLEASE use /userinfo endpoint for all your user needs!
I Just want my app to be secure, my users to have permissions… what should I do?
I got you! The configs are complicated and the internet is confusing. Please follow this example for a full config!
Step by step: Make an app, prepare some claims, add claims to users
I have a flask app for you on the downloads sections, for the implementation; what is important now is to make it in Keycloak.
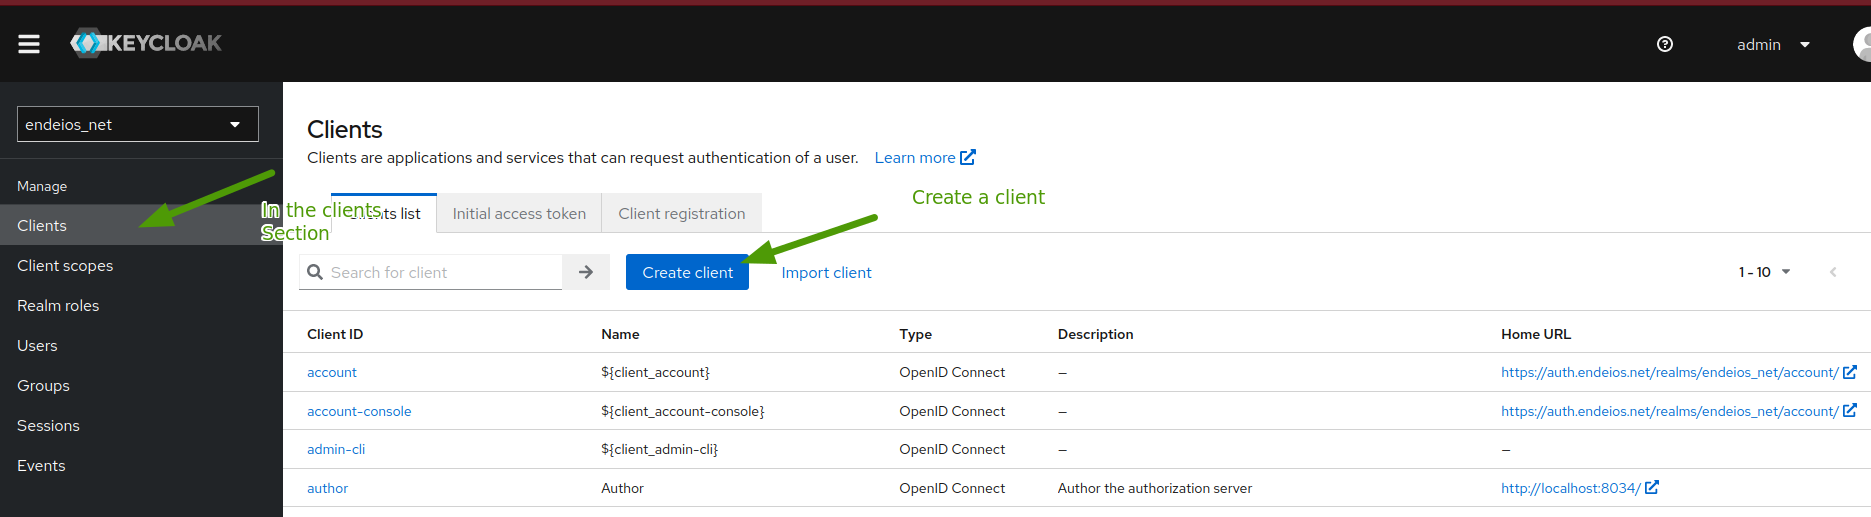
- Create an app on keycloak
![Create a new client]()
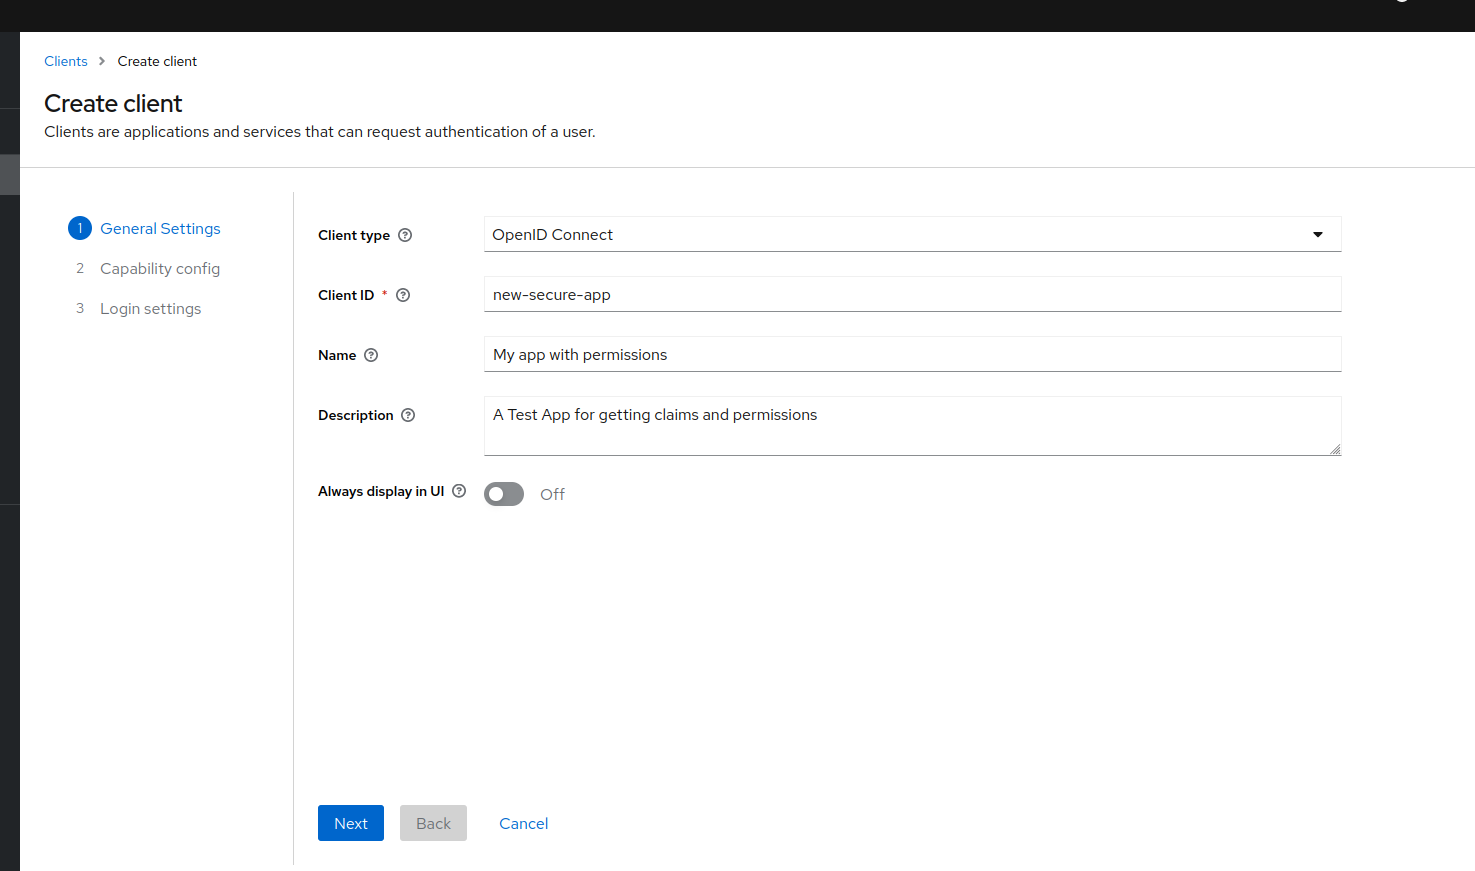
![Put some basic info]()
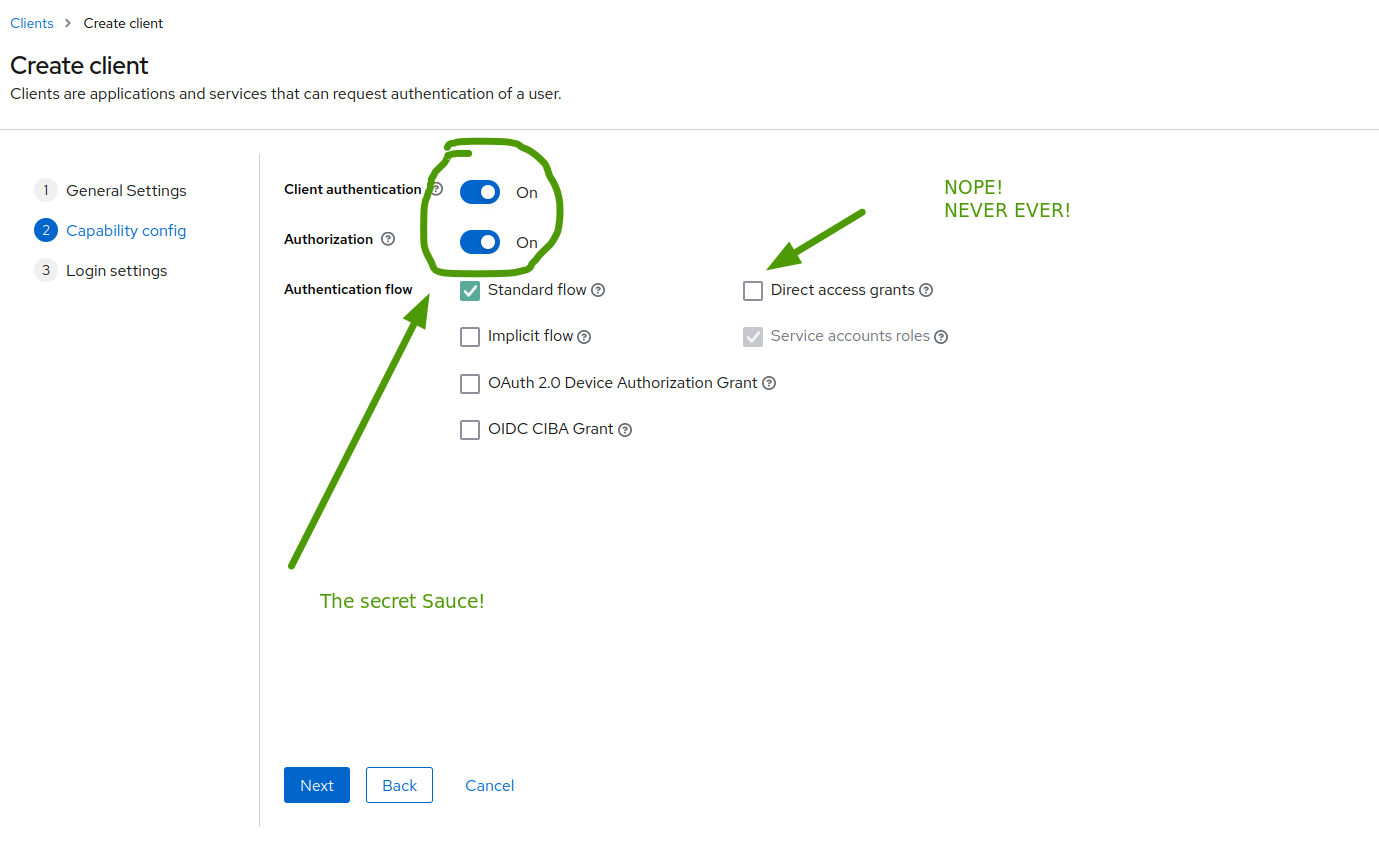
![important config]()
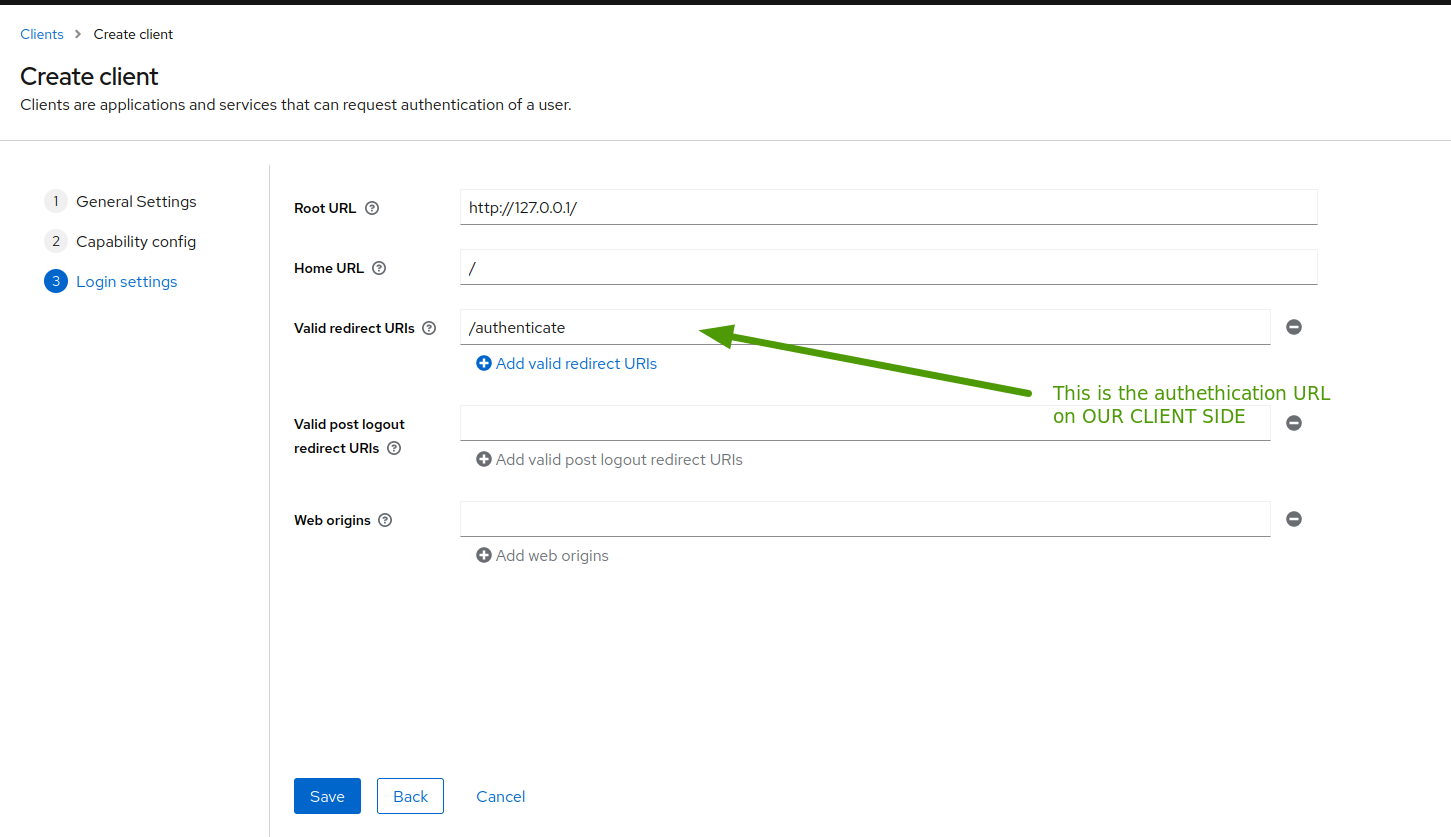
![redirect config]()
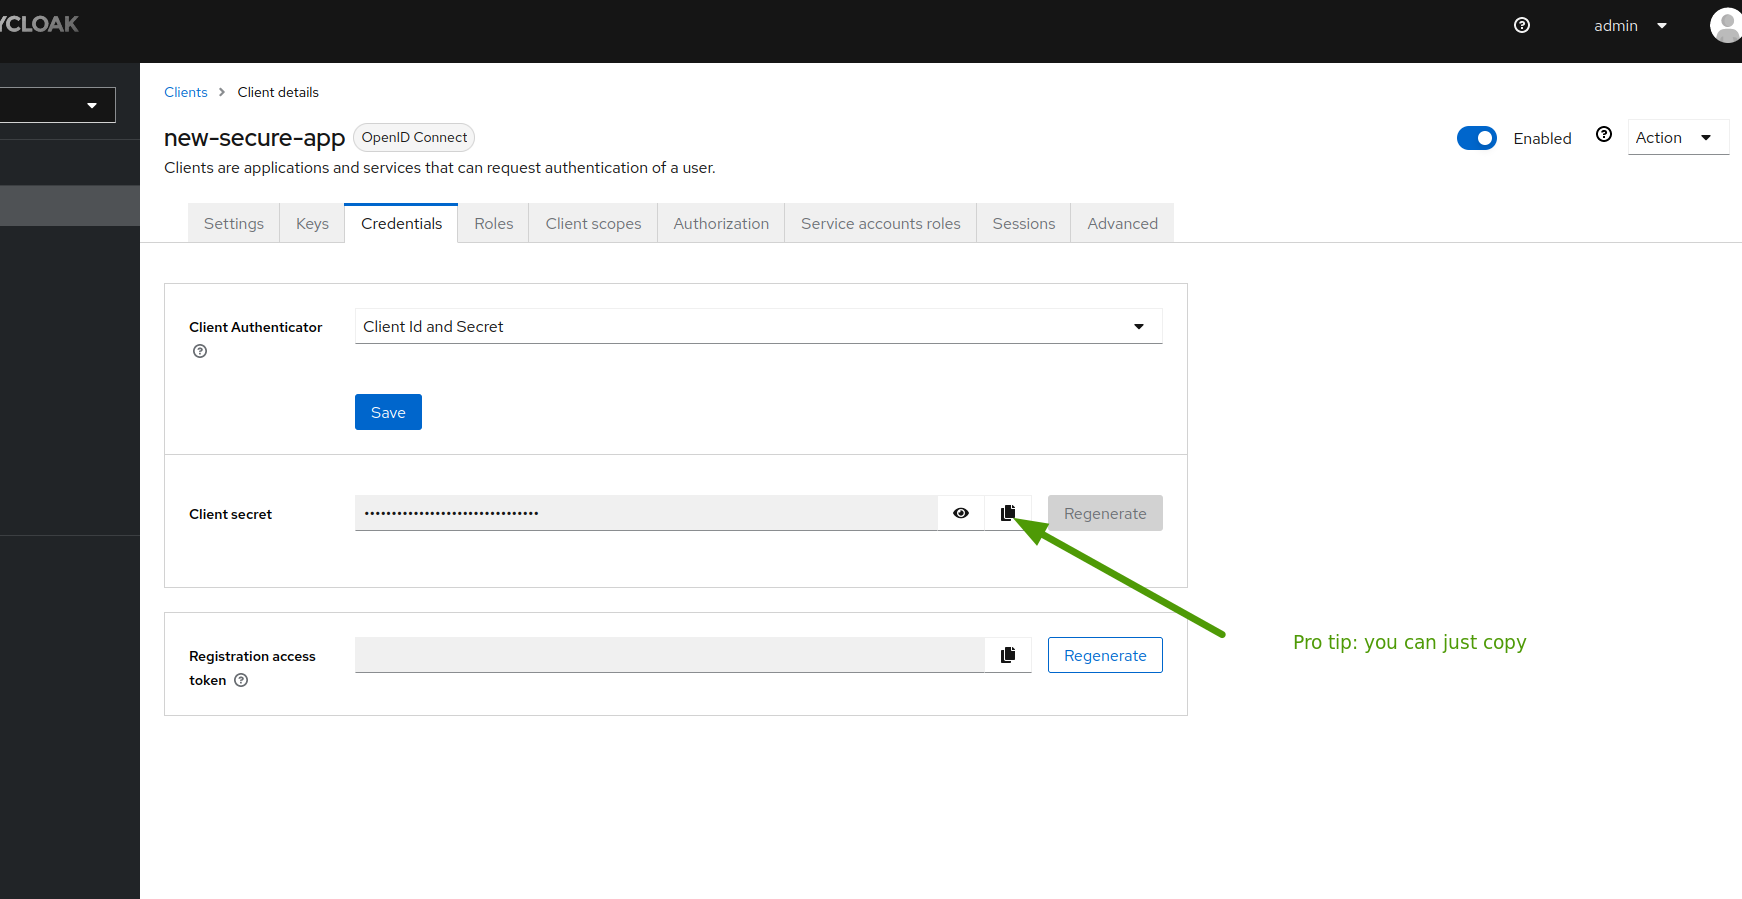
![final result]() Now that the app is created, you can get the client secret
Now that the app is created, you can get the client secret
![how to get the client secret]()
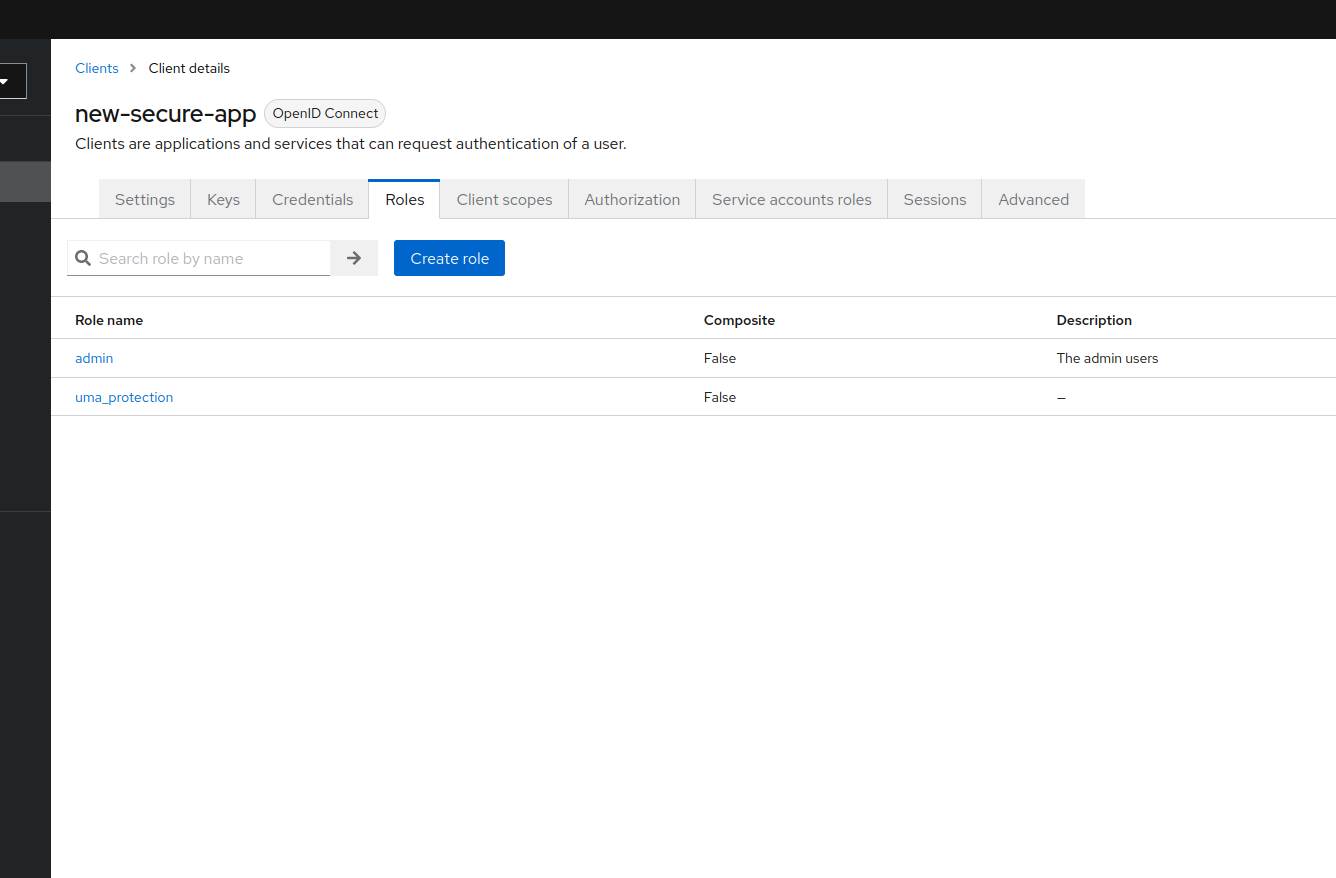
- Add a new role to the app, called admin for example: this role is local to the app
![add a new role to your app]()
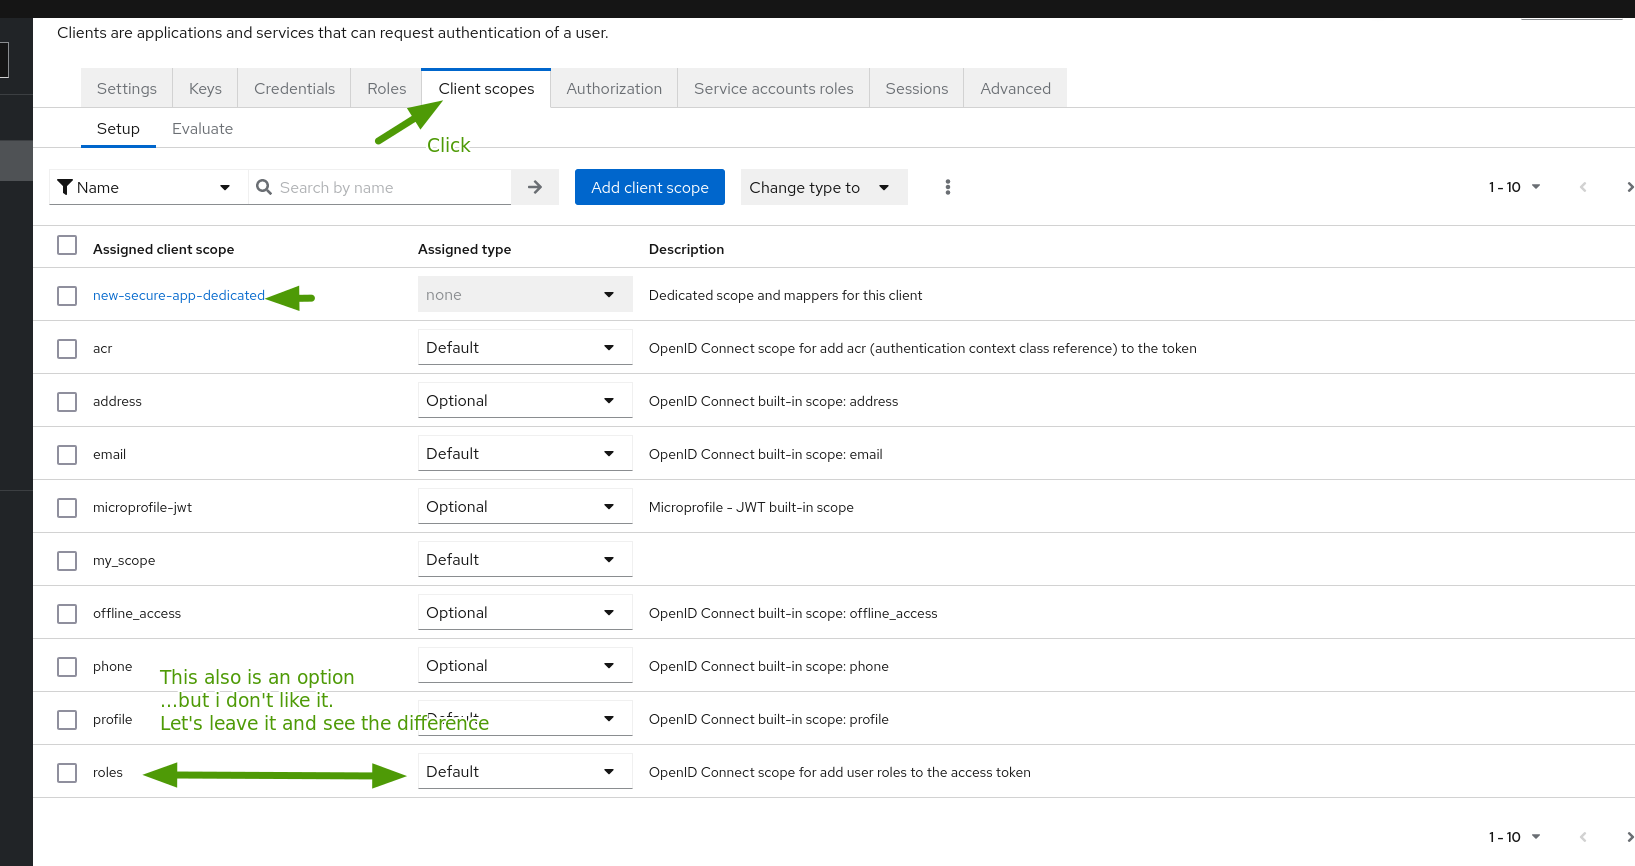
- Go the client scopes tab, and click on the dedicated scope.
Notice the client scope alternative. One could of course just add the
rolesscope to the token request: such config can be sufficient in most cases.![the client scopes for the app]()
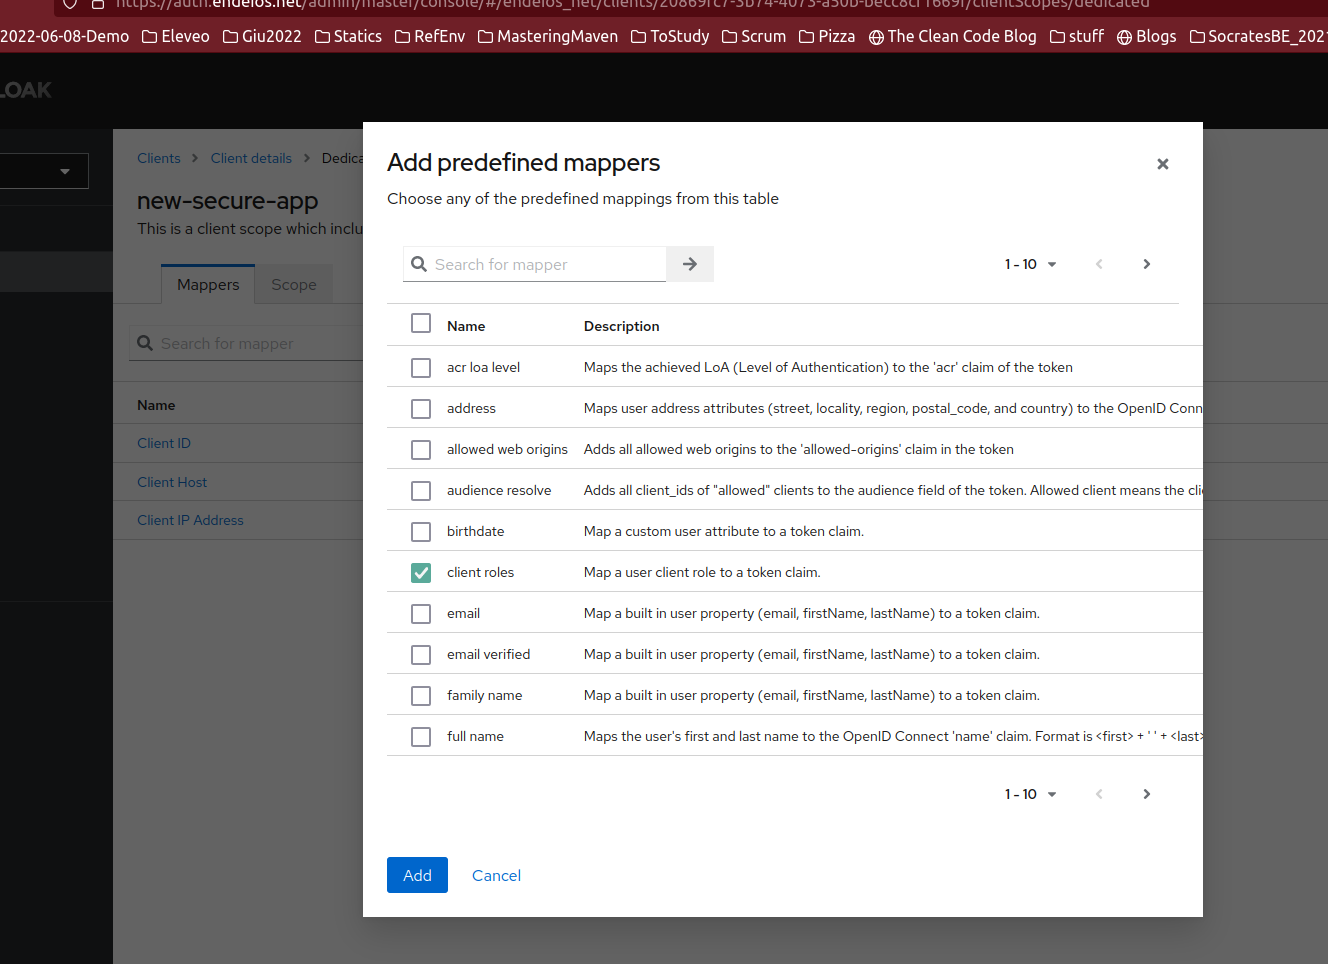
- Add a new “client roles” predefined mapper
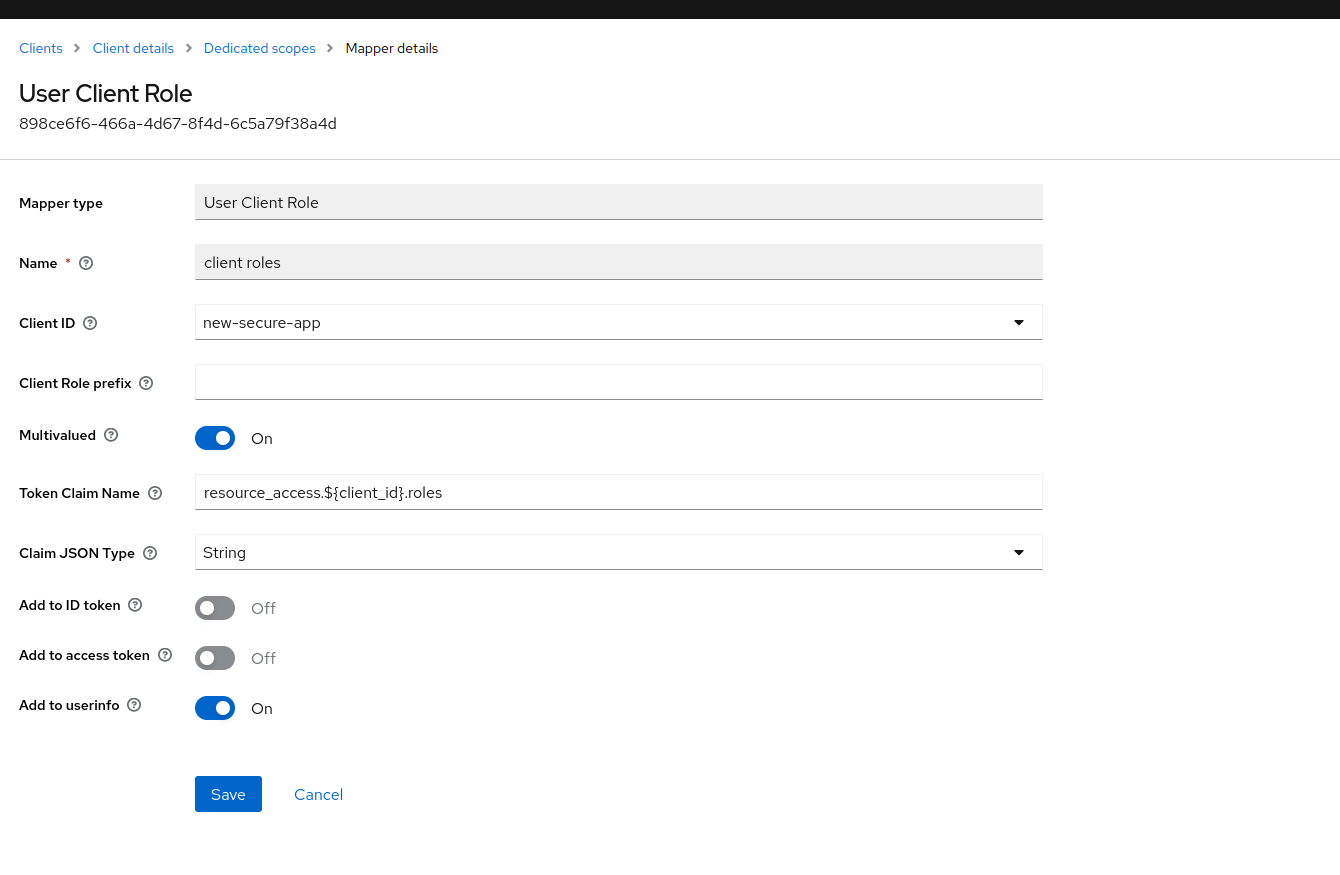
![new client roles mapper]() click on it and set it to give only roles for this app, use the rest of the config, but disable access token and enable on userinfo, so we get this role info on the userinfo service.
click on it and set it to give only roles for this app, use the rest of the config, but disable access token and enable on userinfo, so we get this role info on the userinfo service.
![config for user client role]()
- create a new user
secure app admin![create a new user]()
-
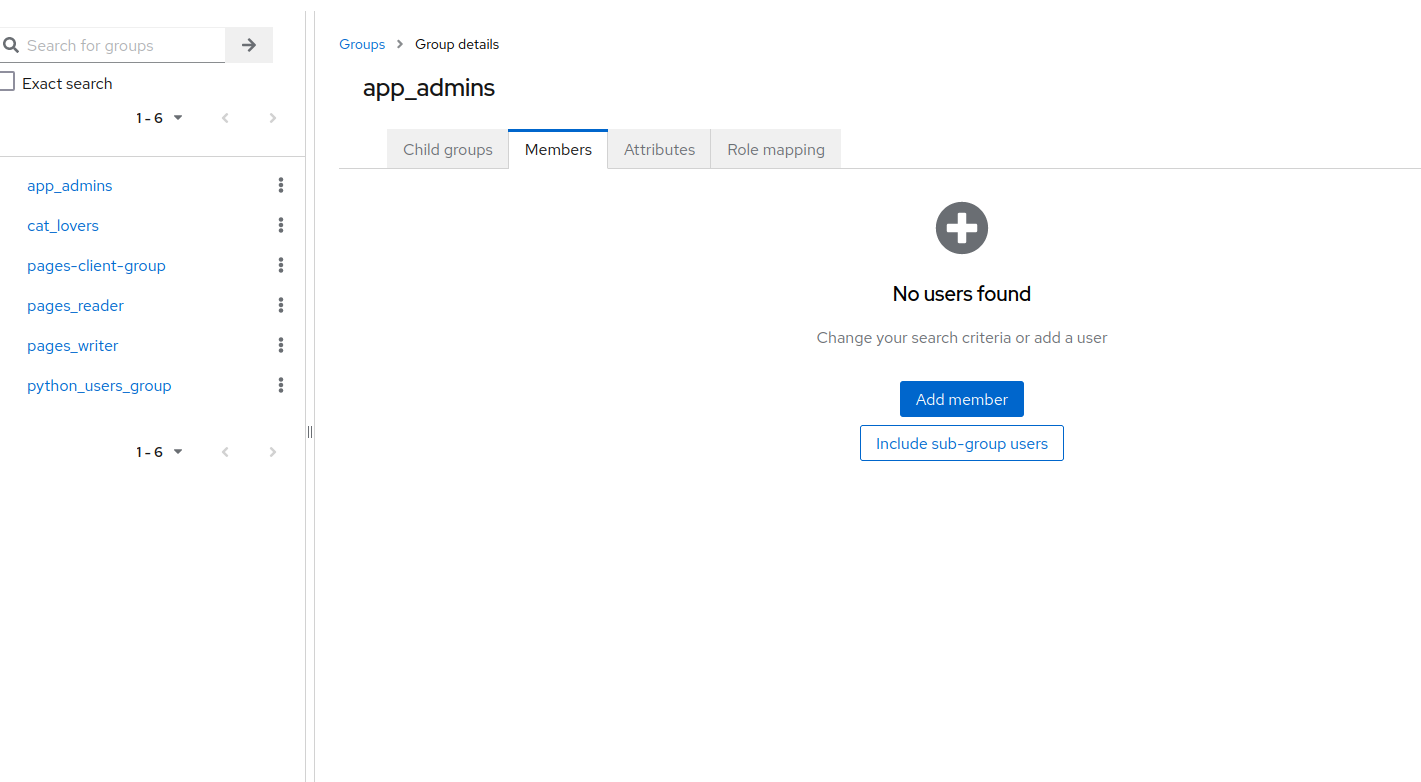
Create a new group that will have the role for the new app, and add the user just created
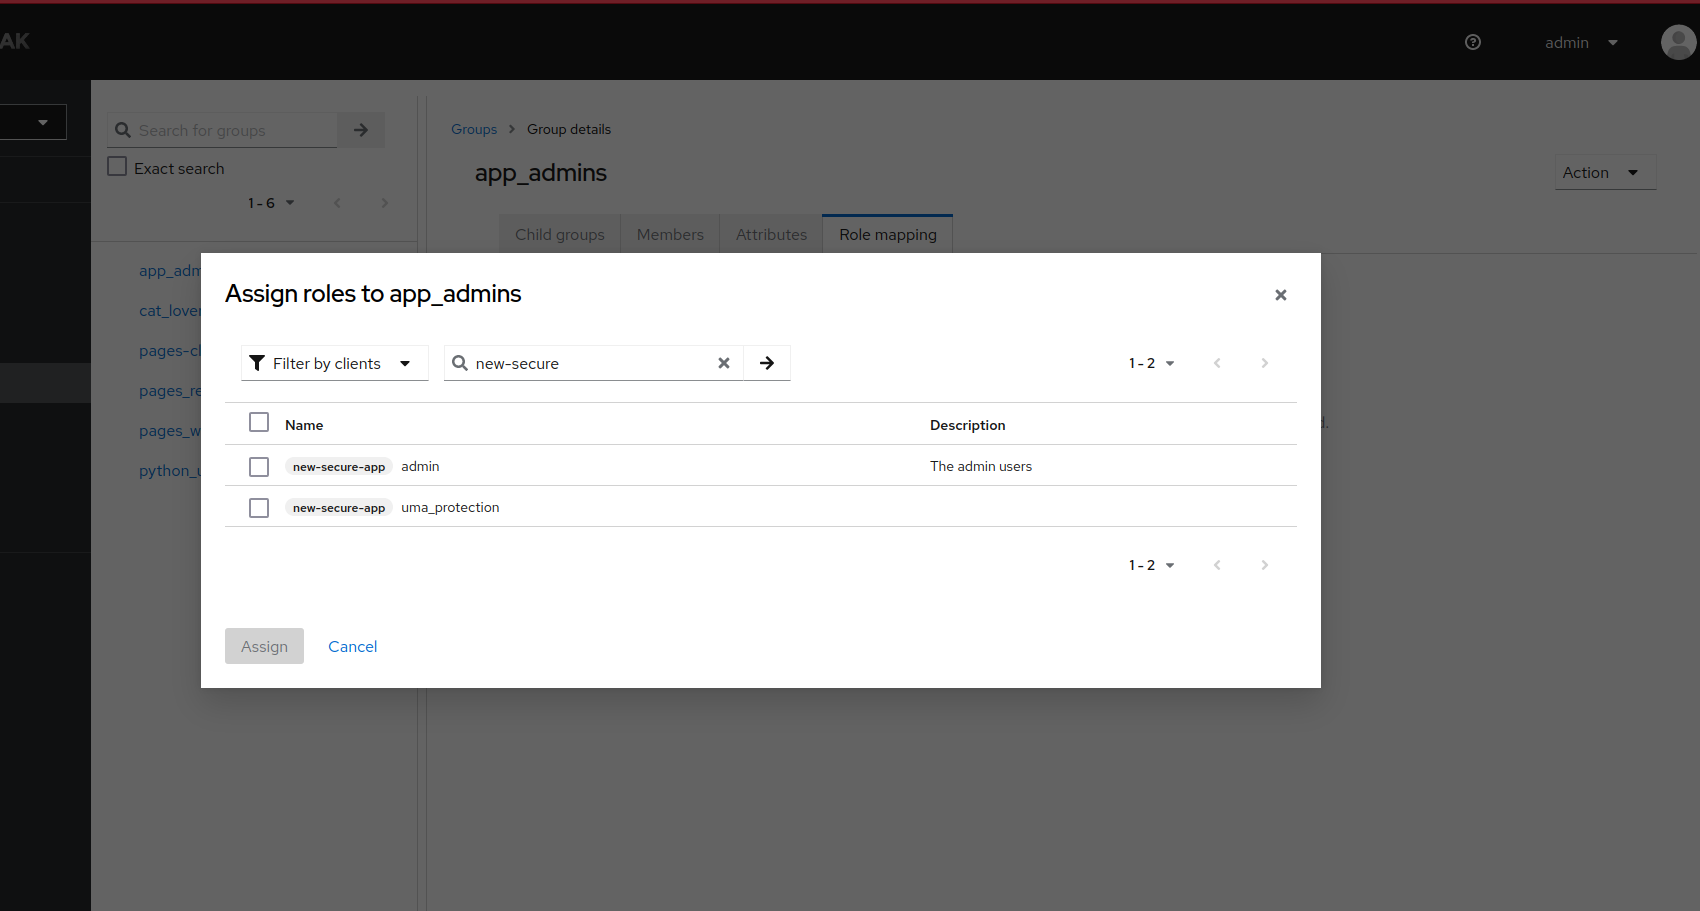
![config for user client role]() Assign the roles in the role mapping
Assign the roles in the role mapping
![config for user client role]()
Congratulations! You now have a group of users with special roles in your new app, and also instructed keycloak to give you the permissions in the
/userinfoendpointnow you just need another user, let’s call her
random_user, that is not in the special group, and we can finally see our app functioning.

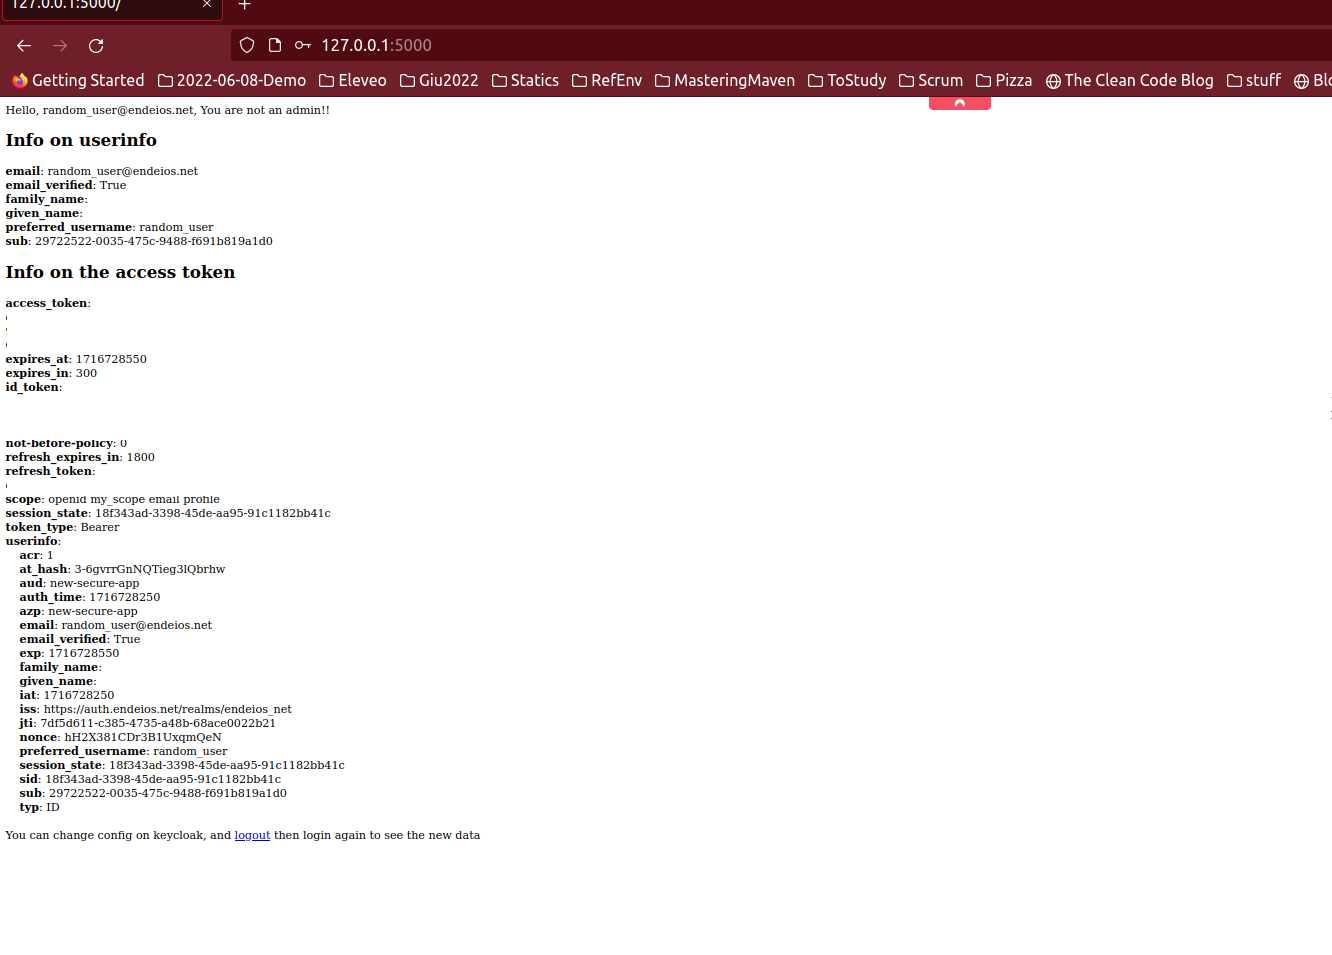
The result
If one logs in with the secure_app_admin, sees
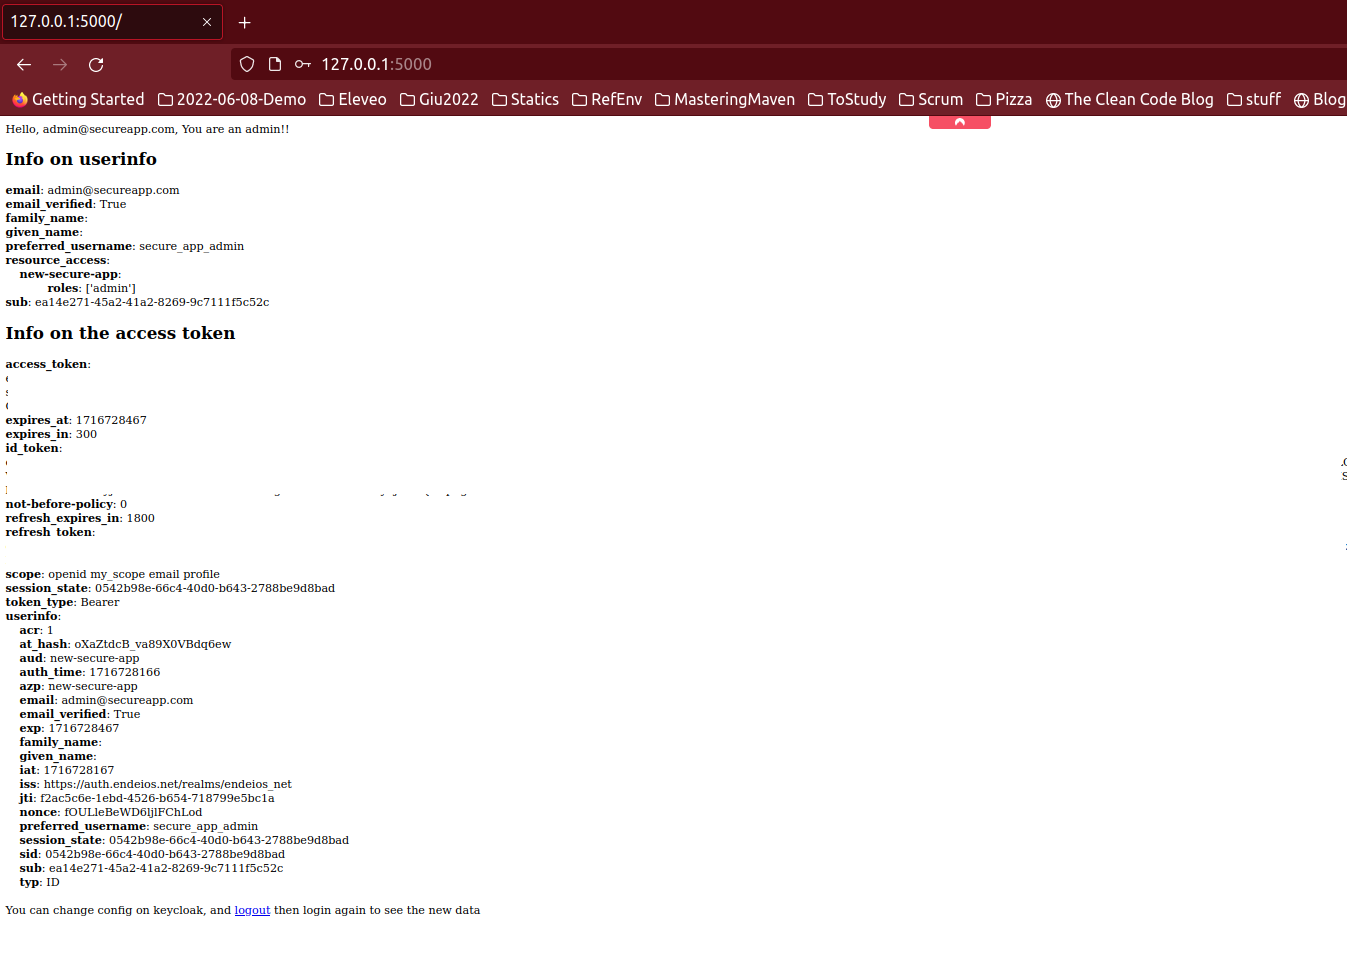 and
and random_user instead
Important note
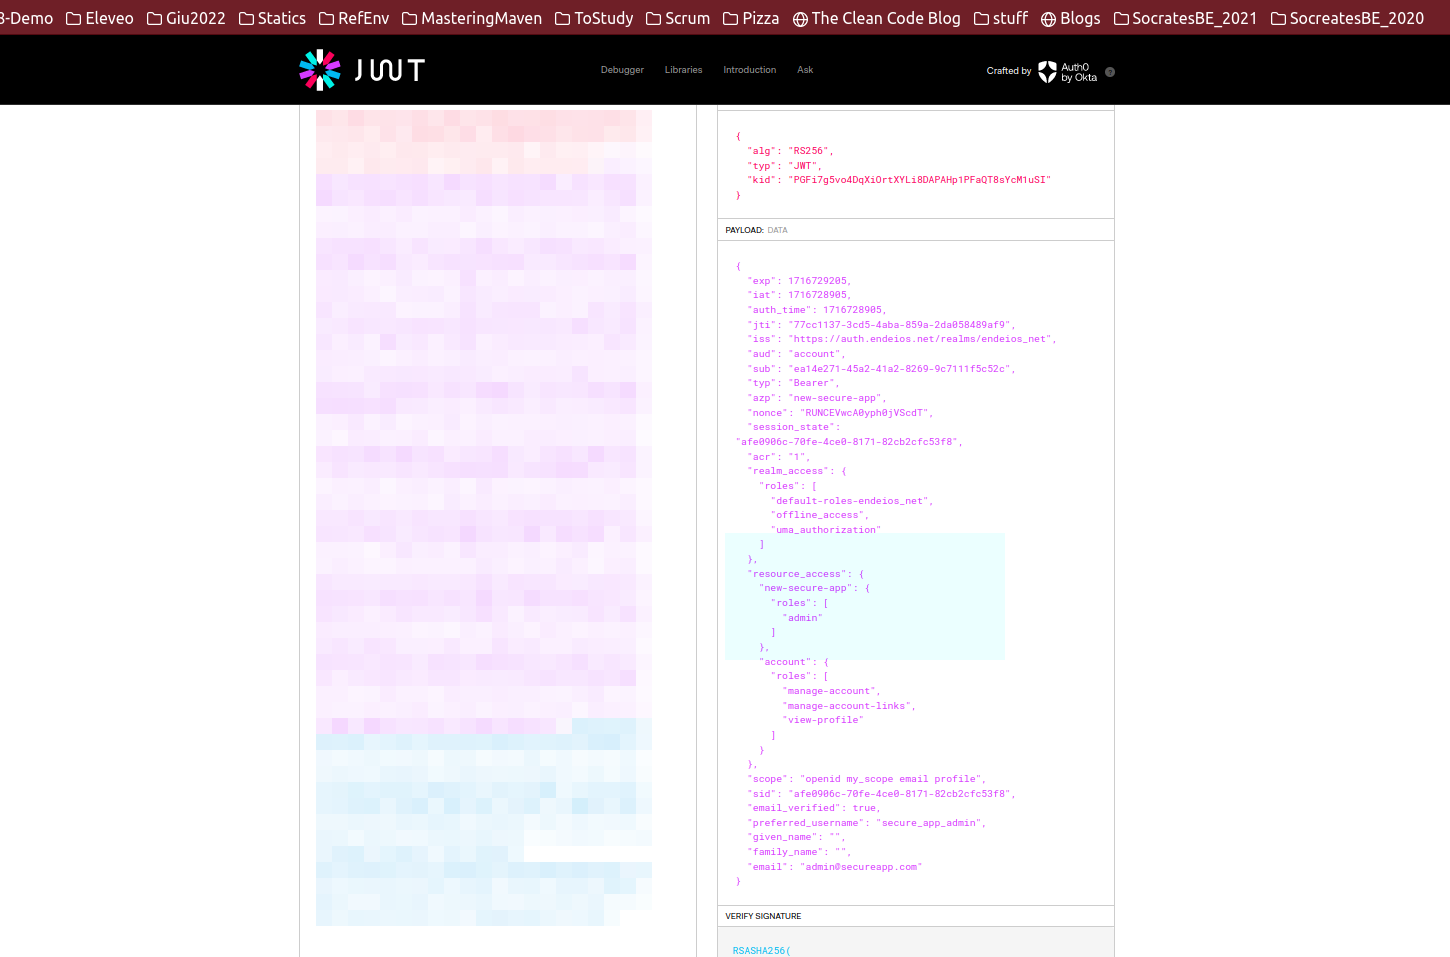
Notice that if you open the tokens with jwt.io you
can still see the permissions in the access token. But now you know how to disable it
and how to configure it.
The zip with the project is here